
TL;DR
-
Kids under 6 ride free on all Tokyo trains (up to 2 per paying adult)
-
Ages 6–11 pay half fare. They need their own IC card and must tap in/out
-
You can now tap your credit card directly on 11 private railways (Tokyo Metro, Toei, Tokyu, etc.), but NOT on JR lines, and NOT for child fares
-
Avoid weekday rush hours (7:30–9:30am and 5:30–8:00pm); trains are packed, and we say that from having pushed a stroller through one more than once
-
Google Maps is all you need for routing. It covers every line, shows fares, and updates in real time
-
Elevators are standard at most major stations. Follow the ♿ signs and you’ll usually find a step-free route, though a couple of stations make you work for it (more on that below)
The Situation in Japan
If you’re arriving from London, New York, or Sydney, Tokyo’s train network will feel like a different planet.
Tokyo is served by over 40 separate railway operators, including JR East (the national rail company), Tokyo Metro, Toei Subway, and more than a dozen private lines like Tokyu, Odakyu, Keio, Seibu, and Tobu. Within the 23 central wards alone there are over 400 stations. Greater Tokyo has nearly 900.
In most Western cities, you deal with one transit authority, one app, one fare system. In Tokyo, you’re often crossing between operators mid-journey, and each charges its own fare. The practical impact: a trip from Asakusa to Shibuya might technically involve Tokyo Metro (one company) while a slightly different route could use Toei Subway (a different company). Your IC card handles all of this automatically, but it helps to know the landscape before you arrive.
The good news:
-
English signage is excellent at every station and on every platform
-
Route-planning apps are incredibly accurate
-
The system runs with near-perfect punctuality: a 3-minute delay is considered newsworthy
-
Families with young children are well accommodated, with wide gates, elevators, and priority seating at most major stations
The first day is always the most confusing. By day two, most families have their rhythm. By day three, kids are usually swiping the gates faster than their parents.
We live in Tokyo and ride these trains constantly with our own twins, stroller and all, so the tips below aren’t purely theoretical: where something has tripped us up (or gone more smoothly than expected), we’ve said so.
Step-by-Step: Your First Train Journey
Step 1: Set Up Your Payment Method
The first decision is how you’ll pay at the fare gates. Tokyo has just made this a lot easier, and depending on your itinerary, you may not need to set up an IC card at all.
Option A: Tap with Your Credit or Debit Card 🆕
Since March 2026, 11 major private railways across the Kanto region accept contactless payments directly at the fare gates, just like tapping an Oyster card in London or a Navigo in Paris. No setup, no deposit, no IC card needed for adults.
Supported operators (54 lines, 729 stations):
Tokyo Metro, Toei Subway, Tokyu, Odakyu, Keio, Keikyu, Tobu, Seibu, Sotetsu, Yokohama Minatomirai Railway, Odakyu Hakone
Accepted payment: Visa, Mastercard, JCB, American Express, Diners, Discover, UnionPay. Physical card, smartphone (Apple Pay / Google Pay), or smartwatch all work.
→ Official list of supported stations – Toei Subway
How to spot the right gate:
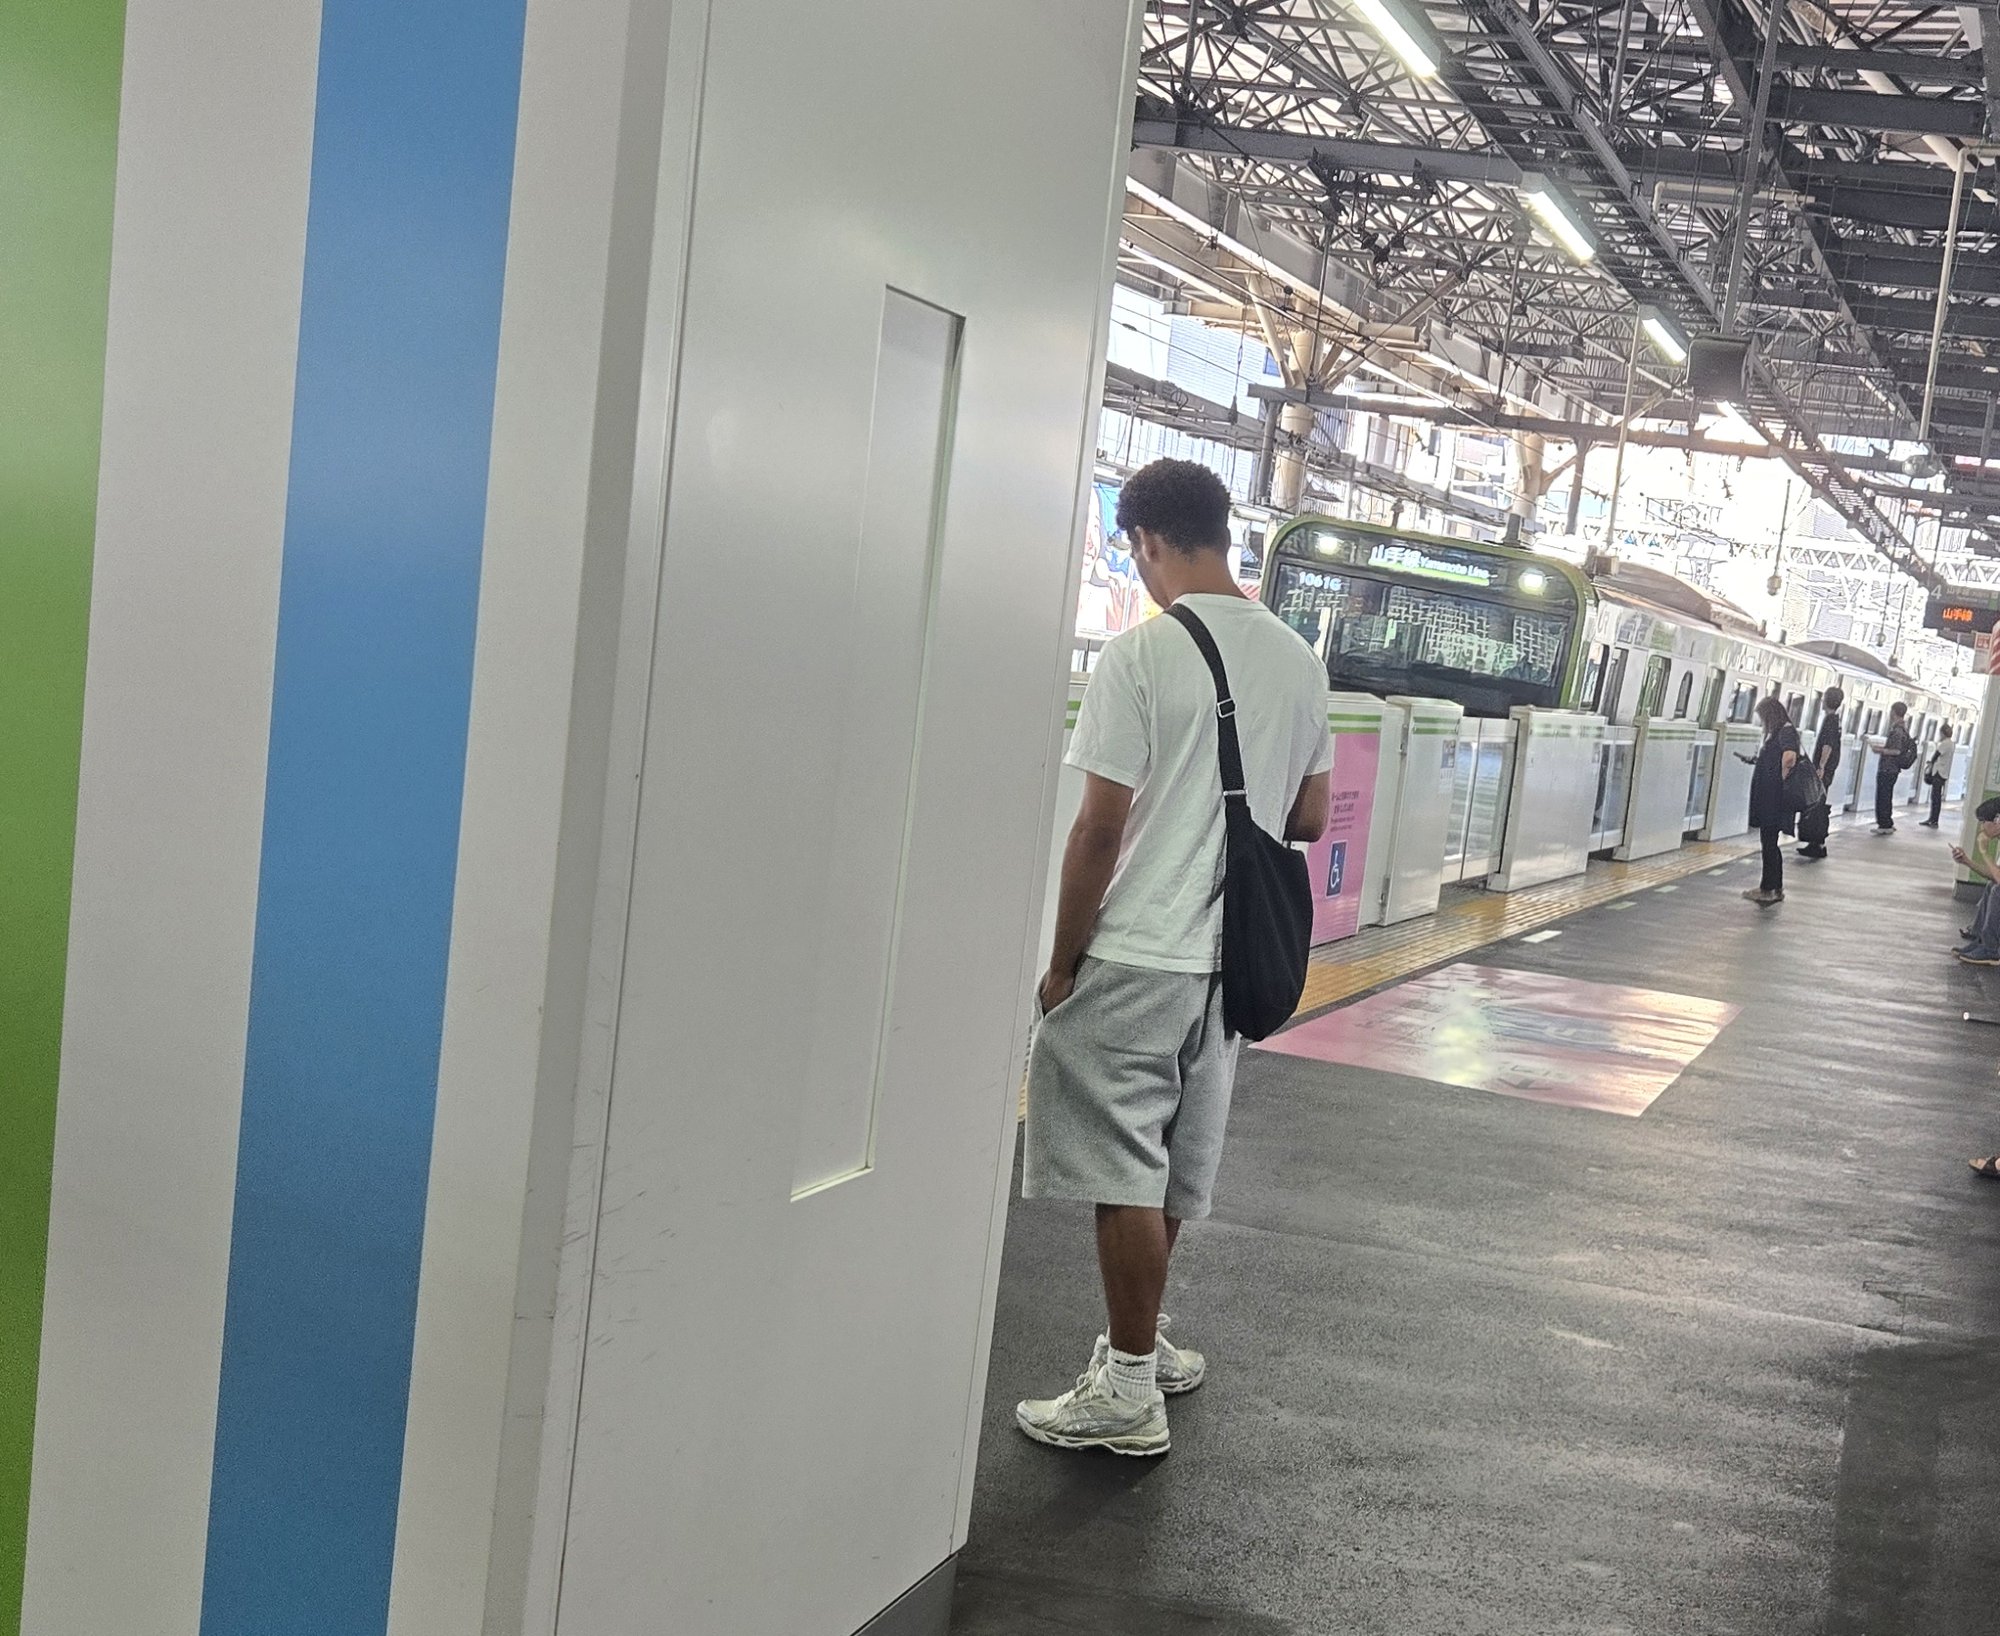
Credit card tap is only available at wide gates (the wheelchair-accessible ones). Look for the familiar contactless symbol: the ripple wave icon )) on a dedicated terminal next to the gate. This is a separate reader from the standard IC card reader; tap here, not on the IC panel.
💡 Good news for families with young children: If you have kids under 6, you’ll be using the wide gate anyway (for strollers, or to walk through together). That makes credit card tap particularly convenient: the reader is right there on the gate you’re already heading to.
⚠️ Two important limits to know:
-
JR lines are not supported. This includes the Yamanote Line (the green loop around central Tokyo), the Chuo Line, Saikyo Line, and all other JR services, including the Narita Express and the Shonan-Shinjuku Line. For JR, use an IC card or buy a paper ticket at the machine.
-
No child fare. When a child aged 6–11 taps with a credit card, they are charged the full adult fare, not half. Children in this age range must use a child IC card or buy a child paper ticket to get the correct half-price.
Option B: IC Card (Suica or Pasmo)
The classic approach, and still the most versatile, especially if you’re using JR lines or travelling outside Tokyo.
Works on: every train line including JR, buses across Japan, and even at convenience stores, vending machines, and many restaurants. Child IC cards automatically apply the correct half-fare for ages 6–11.
Who should get an IC card:
-
Anyone who’ll use the Yamanote Line or other JR services regularly
-
Children aged 6–11 (credit card tap charges adult fare)
-
Families planning to travel outside Tokyo or take buses
How to get one:
-
At any JR East station ticket machine, select “Suica,” then “New Issue.” You’ll pay a ¥500 refundable deposit plus your starting balance.
-
iPhone users can add Suica in the Wallet app before leaving home; no Japanese Apple ID needed as of 2026.
-
Android users can add Suica to Google Wallet, but only on a phone with Osaifu-Keitai/FeliCa hardware. Japan-market Android phones support it natively; most Android phones sold outside Japan don’t (some newer Google Pixel models are a partial exception). If you’re unsure whether your phone qualifies, plan on a physical card instead.
Keep ¥2,000–¥3,000 loaded per adult per day. Top-up machines with English menus are at every station, but plan on cash: most physical-card top-up machines don’t accept credit cards (Mobile Suica in Apple Wallet is the main exception, since it can be topped up with a linked credit card from the Wallet app itself).
Option C: QR Code Day Pass (Tokyo Subway Ticket) 🆕
If you’re planning a full sightseeing day with multiple Metro and Toei rides, the Tokyo Subway Ticket is now available as a QR code: buy it on your phone before you arrive, with no physical counter or machine needed.
What it covers: Unlimited rides on all Tokyo Metro and Toei Subway lines for a fixed period from first use.
| Pass | Coverage | Adult | Child |
|---|---|---|---|
| Tokyo Subway Ticket 24h | Metro + Toei | ¥1,000 | ¥500 |
| Tokyo Subway Ticket 48h | Metro + Toei | ¥1,500 | ¥750 |
| Tokyo Subway Ticket 72h | Metro + Toei | ¥2,000 | ¥1,000 |
| Tokyo Metro 24h pass | Metro only | ¥700 | ¥350 |
Who can buy: The Tokyo Subway Ticket is a tourist-exclusive product; you’ll need a foreign passport with short-term stay status to purchase it. The Metro-only 24h pass has no such restriction.
How to use: At the ticket gate, look for the QR reader panel (a small screen with a QR symbol). Hold your phone to it and walk through. At a small number of stations not yet equipped with QR readers, exchange your QR at a ticket machine for a magnetic card before heading to the gate.
Is it worth it? At ¥1,000/24h for the Tokyo Subway Ticket, the pass pays off if you take 4 or more Metro/Toei rides in a day; each journey typically costs ¥200–¥300 on credit card tap. On a packed sightseeing day (Asakusa → Ueno → Shibuya → back), it easily covers itself. On a slower day with only 2–3 rides, credit card tap or an IC card is cheaper.
→ Purchase via the Tokyo Metro official site or travel booking platforms before arrival.
Which should you choose?
| Your situation | Best option |
|---|---|
| Mostly using Tokyo Metro, Toei, Tokyu, etc., no JR | Credit card tap: zero setup |
| Full sightseeing day with 4+ Metro/Toei rides | QR day pass: flat rate, no tap-out needed |
| Planning to use the Yamanote Line or other JR services | IC card (or credit card + paper JR tickets) |
| Travelling with children aged 6–11 | IC card for the kids |
| Heading outside Tokyo or taking buses | IC card, still the most universal |
| All of the above | IC card for everyone: it just works everywhere |
Step 2: Plan Your Route
Open Google Maps, type your destination (the app handles both English and Japanese input), and tap Directions → Train. You’ll see:
-
Which lines to take and where to transfer
-
Platform numbers
-
Total journey time and fare
-
Real-time delay alerts
One trick worth knowing: tap “Route options” before you confirm, then set a departure or arrival time. This lets you deliberately avoid rush-hour trains and pick less crowded alternatives.
For longer trips involving the Shinkansen, Jorudan’s Norikae Annai or Navitime for Japan Travel give more precise fare breakdowns, but for everyday Tokyo sightseeing, Google Maps is sufficient.
One thing Google Maps won’t always tell you: a route flagged as step-free or “accessible” isn’t always a quick transfer. Changing from Tokyo Metro to JR at Yotsuya Station, for example, can mean exiting to street level and walking a fair distance rather than a direct underground connection. If a transfer looks important to your schedule, it’s worth a quick search for that specific station before you commit to the route.
Step 3: Navigate to the Right Platform
At major hubs like Shinjuku, Tokyo Station, or Shibuya, getting to the correct platform can feel like navigating an airport. The key is line color coding.
Every Tokyo train line has an assigned color and a letter-number code:
-
Ginza Line → orange / G
-
Marunouchi Line → red / M
-
Yamanote Line → green / JY
-
Chuo Line (Rapid) → orange-red / JC
Follow the colored overhead signs for your line. If you’re going somewhere with an elevator, which you should be if you have a stroller, look for the ♿ symbol on directional signs. Accessible routes are clearly marked at most stations, though not always obviously: Ginza Station’s elevators in particular can be tricky to spot from the main concourse. The fastest fix, in our experience, is just to tell a staff member where you’re headed and let them point you the right way rather than hunting for the sign yourself.
Google Maps also shows elevator routes when you select “Wheelchair accessible” under route options, highly recommended if you’re travelling with a pushchair.
Step 4: Tap In
Using an IC card or mobile Suica: Touch your card or phone/watch to the black IC reader on the standard gate. A beep confirms the tap.
Using credit card tap: Head to the wide gate (wheelchair-accessible gate) and look for the contactless symbol )) on a dedicated terminal, separate from the IC reader. Tap your card, phone, or watch here. The wide gate is the only gate type equipped with the credit card reader at this stage. It’s a smooth system in the large majority of cases; the one time it errored out on us, telling the station staff at the adjacent booth sorted it out immediately, so don’t panic if a tap doesn’t go through cleanly the first time.
With a pushchair: You’ll be going through the wide gate anyway, so credit card tap fits naturally into your flow. Staff in the booth next to the gates can open the gate manually if you need a hand.
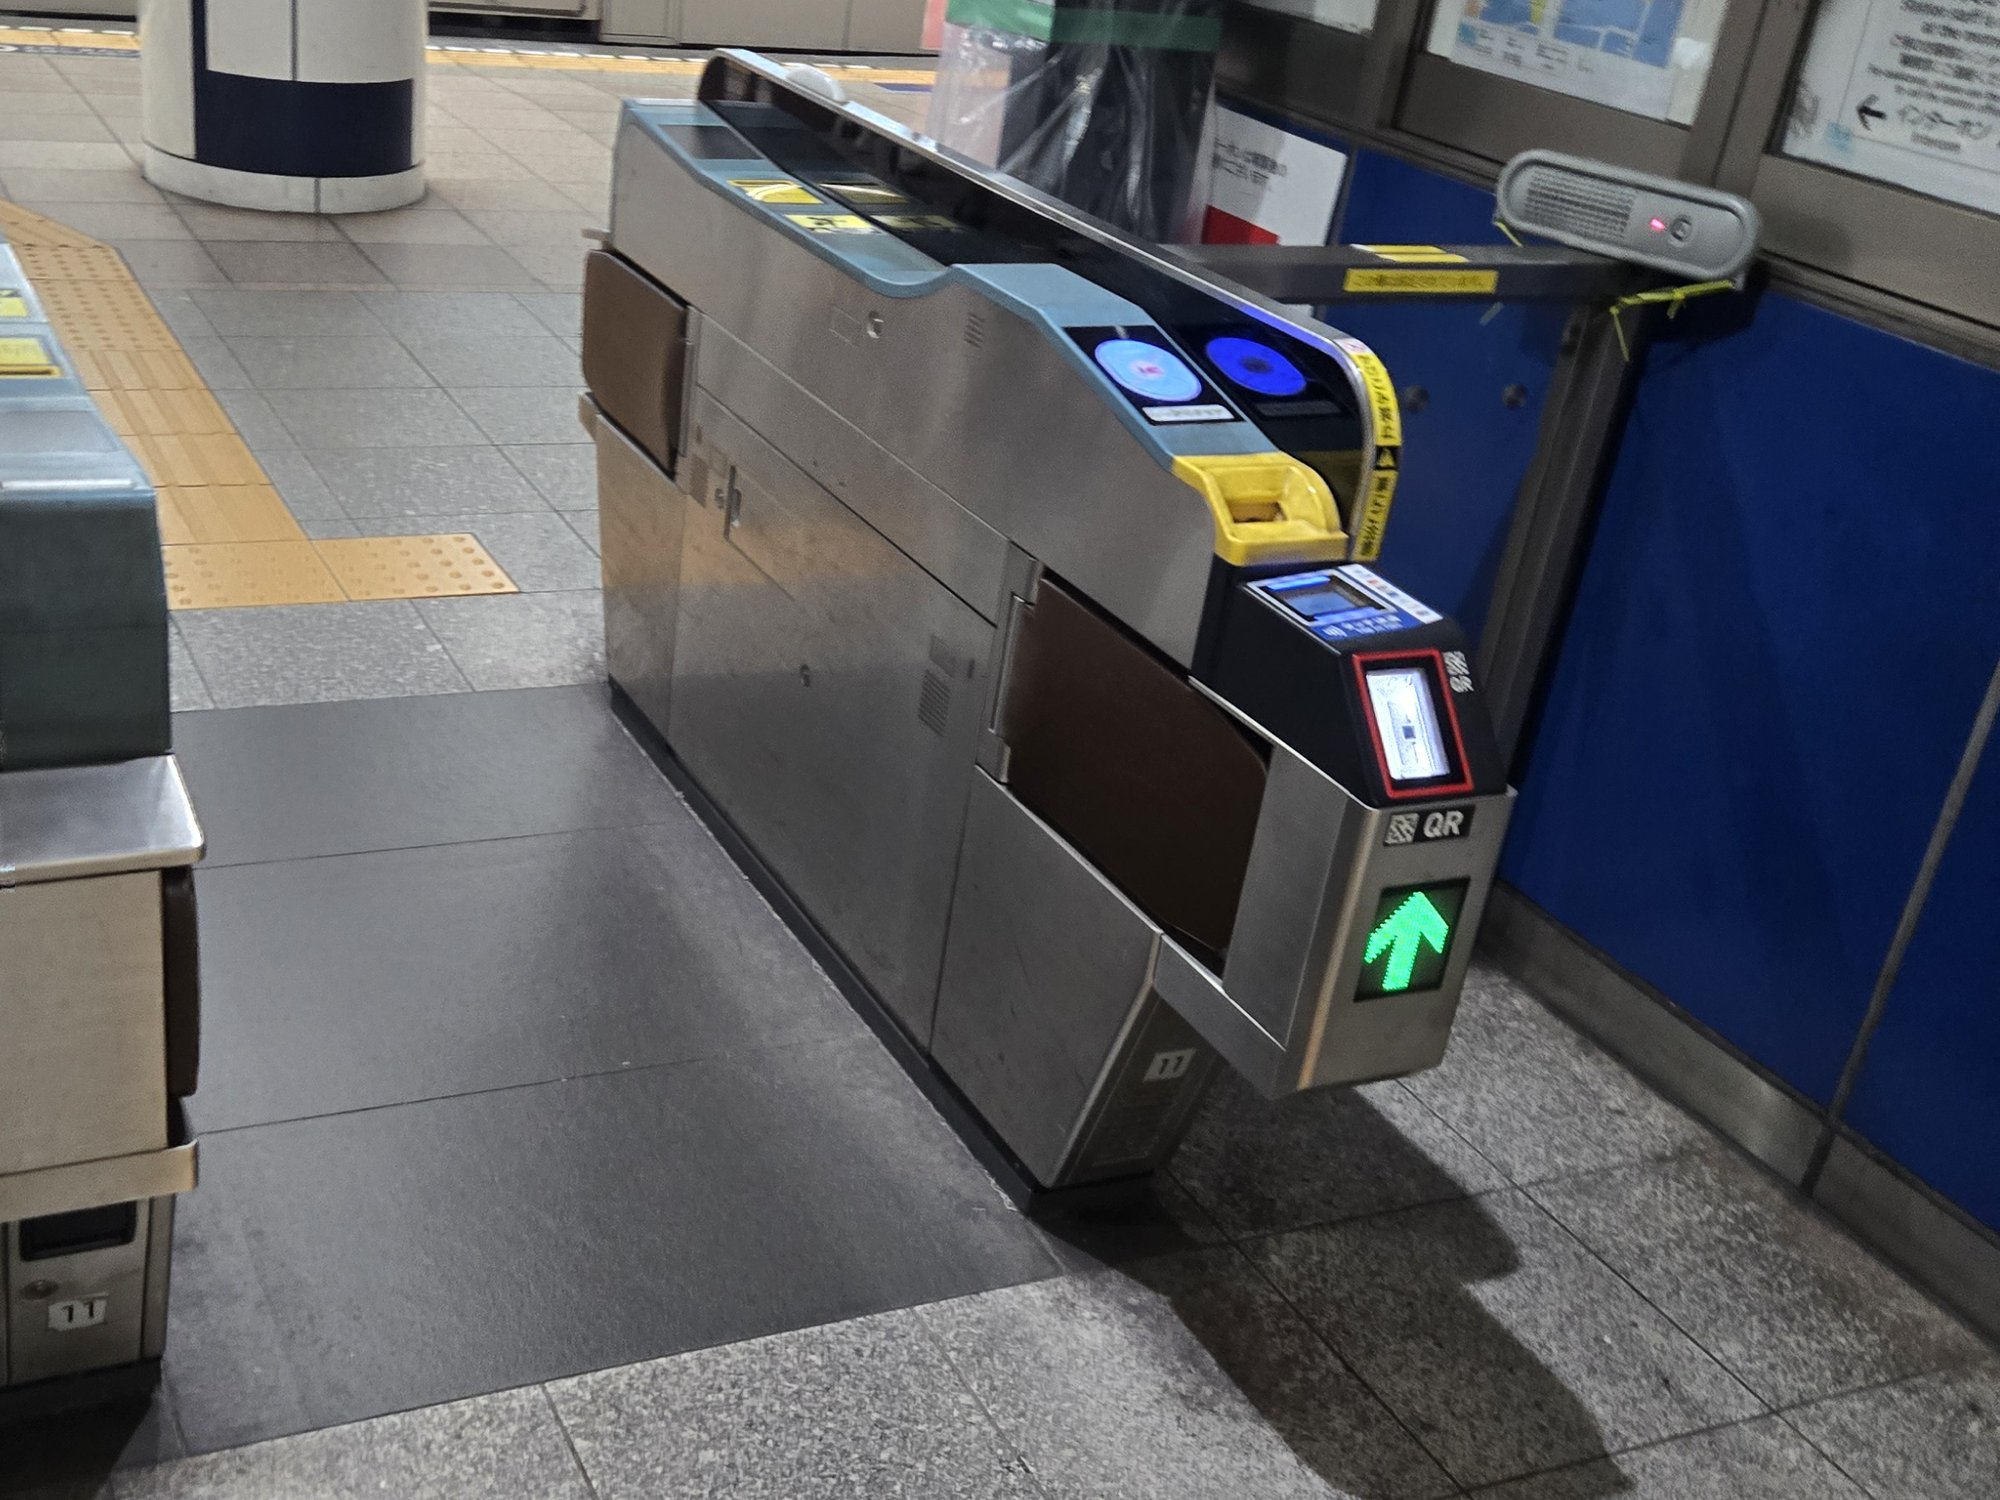
Finding the stroller space on the platform:
Many Tokyo Metro trains have dedicated stroller spaces: wider sections of the car designed for pushchairs and wheelchairs, with floor markings showing exactly where to park. Look for a wheelchair/stroller pictogram and the words “Free Space” printed on the car wall or floor near the door; the label itself is already in English on most Tokyo Metro cars. It’s worth targeting these if you can.
The location varies by line:
| Line | Guaranteed stroller space | Notes |
|---|---|---|
| Ginza Line (orange / G) | Car 1, Door 3 (Asakusa end) · Car 6, Door 1 (Shibuya end) | Every train |
| Marunouchi Line (red / M) | Cars 1–5: Door 3 · Car 6: Door 1 | Every train |
| Chiyoda Line (green / C) | Car 2, Door 4 | ~78% of trains |
| Other lines | Varies by line and train model | See link below |
In our own experience, the Marunouchi Line’s door-3 spaces are reliably wide and easy to use in every car we’ve tried. The Ginza Line’s marked space is real, but the car shape around Door 3 makes it an oddly narrow nook in practice, so don’t expect the same amount of room as on the Marunouchi Line.
→ Go! Free Space: a community database of stroller and wheelchair space locations for every Tokyo-area line (Japanese-language, but the diagrams are easy to follow visually).
Most of the time, other passengers make room around the marked space without being asked. The one exception we’ve run into was a rush-hour ride where someone had already settled into the space and didn’t move, which meant finding room near the doors instead. It’s not the norm, but it’s worth having a backup spot in mind rather than assuming the marked space will always be free.
On the platform, stand inside the painted queue markings. Passengers exit first, then you board. During rush hours, let one train go rather than trying to force a pushchair in; the next one is usually 2–3 minutes away.
Step 5: Find a Seat
Tokyo train cars have two seating zones:
Regular seats: no reservation, first come first served. On longer journeys (say, 15+ minutes), there’s usually space for families outside rush hour. In our experience, plenty of passengers offer up a regular seat once they notice kids with you, not just the marked priority ones; it probably helps that our twins have a habit of loudly announcing that they want to sit down.
Silver seats, officially called priority seating: the seats at the end of each car, marked with a silver/grey headrest cover and small pictograms on the window or seatback (a cane, a pregnant figure, a person with a child). These are reserved for elderly passengers, pregnant women, passengers with disabilities, and parents with young children. You are explicitly welcome to use them with a baby or toddler. Don’t hesitate.
Some lines have women-only cars during rush hours, clearly marked with pink floor stickers and signs on the platform. These apply to the front or end car of certain trains on weekday mornings. It’s specific to the commute window, so it rarely comes up for a family riding later in the day for sightseeing.
Step 6: Tap Out
Touch your IC card to the reader at the exit gates. The system calculates your fare based on distance and deducts it. If your balance is too low, you’ll be stopped; go to the fare adjustment machine, usually just inside the exit barrier and labeled in English as well as Japanese. Insert your card and it’ll top you up enough to exit.
The most common beginner mistake is forgetting to tap out. If you walk through without tapping (following someone else through an open gate, for example), you’ll be charged the maximum possible fare from your entry station. If this happens, go straight to the station staff window; they deal with this regularly and will fix it in under a minute.
Route Apps Compared
| App | Best for | Ease | Notes |
|---|---|---|---|
| Google Maps | Day-to-day routing | ★★★★★ | Best overall; English, live delays, elevator routes |
| Navitime for Japan Travel | Complex multi-mode trips | ★★★☆☆ | Great for combining trains, buses, and walking |
| Jorudan Norikae Annai | Precise fare + timetable lookup | ★★★☆☆ | Useful for Shinkansen planning; interface is older |
| Suica app (JR East) | Balance management | ★★★★☆ | For managing your IC card; not a route planner |
Recommendation for most families: Install Google Maps with offline maps downloaded for Tokyo, and use the Suica app to monitor your card balance. That’s it.
Common Mistakes Families Make
1. Getting on a rush-hour train with a stroller
This is the biggest one, and we’ve done it ourselves twice: once heading to a flight, once heading to Disneyland, both times on an early weekday morning with a stroller in tow. It’s hard going. Everyone around you is rushing, and you can feel the impatience even when no one says anything. We stuck to the Marunouchi Line’s marked stroller space both times, which helped, though the space isn’t a guarantee: on one of those rides, someone had already settled into it and wasn’t willing to move, so we ended up finding room elsewhere in the car. Adjust your schedule if you can: leave your hotel after 9:30am on weekdays, or plan to be somewhere you want to stay (a café, a park, your hotel breakfast) until the crush passes. Evenings: dinner inside before 5:30pm or after 8:00pm.
2. Confusing different train operators
When Google Maps routes you via “Transfer at Shibuya to Tokyu Den-en-toshi Line,” that’s a completely separate company from Tokyo Metro. Your IC card handles the payment split automatically, but if you’re thinking “I’m on the Tokyo Metro pass,” you’re not anymore. It matters most if you have a day pass or paper ticket rather than an IC card.
3. Forgetting to tap your child out
If you have a child aged 6–11 on their own IC card, they need to tap in and out just like you. Easy to forget when you’re wrangling kids and luggage. Make it a ritual: everyone taps out together.
4. Running out of IC card balance mid-journey
The fare adjustment machine fixes this, but it adds stress. Keep at least ¥1,000 on each adult card at the start of every day. Top up at any station’s ticket machine; the machines have English menus but generally take cash only for a physical card (Mobile Suica in Apple Wallet is the exception, toppable with a linked credit card in the app itself).
5. Missing the elevator and going up stairs with a pushchair
At busy stations, the elevator entrance is sometimes around the corner or on a different side of the building from the main entrance, and Ginza Station is a good example of one where it’s not obvious. Don’t just follow the crowd in; stop at the entrance, look up for the ♿ sign, and if you can’t spot it within a few seconds, just ask a staff member where you’re headed. It will save you from carrying a pushchair up three flights of stairs.
6. Letting a child aged 6–11 tap with your credit card
This is easy to do when you’re rushing through the gate with kids in tow. If your child taps the gate with your contactless credit card, they’ll be charged the full adult fare, not the half-price child fare. For children aged 6–11, always use their IC card or buy a child paper ticket. The difference adds up quickly over a multi-day trip.
7. Assuming an “accessible” transfer is a quick one
A route marked step-free or wheelchair-accessible isn’t automatically a short one. Some Metro-to-JR transfers, Yotsuya Station being a case in point, mean exiting the station to street level and walking a real distance to reach the other line rather than a direct underground connection. If a transfer is central to your day’s plan, it’s worth checking that specific station in advance rather than assuming “accessible” also means “fast.”
FAQ
Can I really just tap my credit card to ride the train?
Yes. As of March 2026, 11 major railway operators in the Tokyo area (including Tokyo Metro, Toei Subway, Tokyu, and others covering 54 lines and 729 stations) accept contactless credit card, debit card, Apple Pay, and Google Pay. No IC card setup needed for adults.
Practically speaking: head to the wide (wheelchair-accessible) gate, look for the contactless )) symbol on the dedicated terminal, and tap. Physical card, smartphone, or smartwatch all work. The reader at the wide gate is separate from the IC card reader, so make sure you’re tapping the right one.
The big exceptions: JR lines (Yamanote, Chuo, etc.) are not supported, and children aged 6–11 are charged full adult fare when tapping with a credit card, so kids in that range still need an IC card or paper ticket.
Does credit card tap work on the Yamanote Line?
No. The Yamanote Line is operated by JR East, which has not joined the credit card tap system. The same applies to the Chuo Line, Saikyo Line, and all other JR services. For JR lines, use a Suica (IC card) or buy a paper ticket at the machine. If you’re staying mostly on Tokyo Metro and private lines and only occasionally need JR, buying individual JR paper tickets is a perfectly reasonable approach.
Do children under 6 really travel free on all Tokyo trains?
Yes. On JR East, Tokyo Metro, Toei Subway, and most private railways, children who haven’t yet entered elementary school (roughly under 6) ride free when accompanied by a paying adult. Up to two children per adult travel free. A third child (or more) under 6 pays child fare.
One thing to watch outside Tokyo: this “2 children free per adult” rule applies to most major operators, but some regional systems have different rules. For example, on the Okayama City Tram, only one child under 6 travels free per adult; a second child pays the child fare. It’s a minor detail, but worth knowing if you’re planning side trips beyond the Tokyo area.
Do I need a separate IC card for my toddler?
No. Children under 6 pass through the wide gate with you; no card, no tap needed. If you have three or more under-6 children per adult, the third onwards would need a child IC card for payment. In practice, most families with two children never need to card up their little ones.
Can I bring a pushchair on Tokyo trains?
Yes, pushchairs are permitted on all trains and subways. Many Tokyo Metro trains also have dedicated stroller spaces: wider car sections with floor markings specifically for pushchairs and wheelchairs. On the Ginza Line, the marked spots are Car 1 Door 3 (Asakusa end) and Car 6 Door 1 (Shibuya end), though the space itself is narrower than you’d expect given the car’s shape. The Marunouchi Line’s Door 3 spaces (or Door 1 of Car 6) tend to be noticeably roomier. For other lines, Go! Free Space lists every line’s stroller space positions.
During peak rush hours you may be asked (politely) to fold your pushchair if the car is extremely crowded, but this is rare outside the heaviest commuter lines. All major stations and most smaller ones have elevators, though a few (Ginza Station among them) hide the entrance well enough that asking staff is faster than looking for the sign yourself. See our full guide: Getting Around Japan with a Stroller: What Nobody Tells You
Which Tokyo train lines are least stressful with kids?
Outside rush hours, most lines are fine. If you’re planning sightseeing:
-
Ginza Line (orange, G): connects Asakusa, Ueno, Shibuya; central, manageable, not as crushed as JR lines
-
Yamanote Line (green, JY): the JR loop line around central Tokyo; wide cars, frequent service, easy to understand
-
Chiyoda Line (green, C): useful for Roppongi to Meiji Jingu area; generally uncrowded during day
Avoid the Tozai Line and Saikyo Line at any cost during rush hours.
What are silver seats?
Silver seats, officially called priority seating, are the seats at the end of each train car, with a distinctive silver/grey headrest cover and pictograms marking who they’re for. They are designated for elderly passengers, pregnant women, passengers with disabilities, and families with young children. You are welcome and encouraged to use them without guilt.
Can we eat or drink on Tokyo trains?
Generally no. Eating on local commuter trains is considered poor manners. Drinking from a closed bottle or cup is fine. Long-distance Shinkansen are the exception: eating a bento on the bullet train is entirely normal and part of the experience.
What if my child dashes through the gate without tapping their IC card?
Walk straight to the station staff booth (always right next to the gates) and explain what happened. They’ll handle it immediately; this is a very familiar situation for them. No need to panic.
Is there wifi on Tokyo trains?
Free wifi is available at stations on Tokyo Metro and JR East, but coverage on the trains themselves is inconsistent. For reliable internet, carry a pocket wifi device or a local data SIM, essential if you’re navigating with Google Maps.
Plan Your Tokyo Sightseeing
Now that you know how to get around, here are some destinations worth the journey:
→ Asakusa with Kids: The Complete Family Guide: the historic temple district, easy to reach on the Ginza Line
Also useful:
Information checked: 2026/09